domenica 29 giugno 2008

DB may challenge: petit déjeuner sur l'herbe


DANISH BRAID

Technique: Making and working with yeasted laminated dough
Recipe: “Danish Braid” from Sherry Yard’s The Secrets of Baking
Why Danish Braid?
• Danish dough is in the family of butter-laminated or layered doughs with puff pastry being the ultimate. Danish dough is sweet and is yeast-leavened, however, where as puff pastry is not.
• The process of making Danish dough is less complex than that of puff pastry, but equally as important to achieve best results, and a great starting place to begin to learn about laminated doughs in general.
• Danish dough is extremely versatile, and once made can be used for a variety of baked goods. The possibilities are endless.
*Since our ever-expanding Daring Bakers group lives in two different hemispheres, the Danish Braid will allow for fillings that are in season in both hemispheres. Hopefully that will assist with cost factors and availability of product.
• I love pastry and have never made Danish pastry before.
When I asked Ben to co-host this month, I suggested several ideas, and the Danish Braid seemed to be the best way for people to have the opportunity to learn, if unfamiliar with laminated doughs, and for those familiar, to be able to maximize choices for ingredients not only in the dough, but the fillings, toppings, and the shape of the braid as well.
Some History:
• According to many sources, “Danish” was born when Danish bakers went on strike, and Viennese bakers were brought in to replace them, creating what is referred to as Vienna Bread.
• Conversely, it is also said that Danish bakers went to Vienna to learn the techniques Viennese bakers employed, and Danish dough was created there.
• In the early 1800’s, C.L. Olsen spent time in Germany, believing in the idea of gaining inspiration from bakers of other countries. He brought knowledge back to Denmark to introduce “foreign” breads to his country, also hiring people of other nationalities to bake in his family bakery.
Why Sherry Yard’s recipe?
The Secrets of Baking is one of the newer books in my collection, but I’ve had time to try many recipes and am more than satisfied with the results.
• The organization of recipes in the book is built upon the philosophy that if we learn basic techniques, many other recipes come from those techniques. This isn’t new information, but it’s the first time I’ve seen the information organized in such an accessible fashion.
• Her Danish dough recipe included both cardamom and orange, and the combination sounded intriguing.
Guidelines for this Challenge:• Use the recipe as written to make Danish dough and create at least one Danish Braid. The recipe will allow you to make two full braids unless you choose to make only half the dough.
• Fill the Danish Braid with the apple filling provided and/or any other filling as long as it is something you make yourself from scratch.
Choices• Dough ingredients include ground cardamom and orange zest. Cardamom is traditional in Scandinavian breads, but if it is cost prohibitive, or if you have dietary restrictions, by all means, leave it out or replace it with something else. You are welcome to omit the orange zest or choose another type of citrus to flavor your dough.
• The method or style of your braid is your choice. You may vary the width of the dough strips, type of edging, or angle of cuts.
• Often, a glaze, nuts, or sugar are used as toppings. You may choose to use any or all of these, or others you may find interesting.
• Use one or more fillings such as fresh berries, pastry cream, preserves or jams, curds – there are lots of possibilities.
• Once you’ve made a Danish Braid, experiment with Danish pastries with the extra dough.
If there’s a way to try something savory with the extra dough, then why not?
Terminology:
• Laminated dough – is layered dough created by sandwiching butter between layers of dough
• Detrempe – ball of dough
• Beurrage – butter block
• Turn – each “fold & roll” of the dough produces a single turn in a 3-step process where the dough is folded exactly like a business letter in 3 columns. Each single turn creates 3 layers with this method.

Yard recommends the following:
Use well-chilled ingredients. This includes flour if your kitchen temperature is above 70 degrees F (~ 21 degrees C).
• It is recommended that long, continuous strokes be used to roll the dough rather than short, jerky strokes to make sure the butter block is evenly distributed.
The 30-minute rest/cooling period for the dough between turns is crucial to re-chill the butter and allow the gluten in the dough to relax.
• Excess flour accumulated on the surface of the dough after turns should be brushed off as pockets of flour can interfere with the rise.
• Yard calls for a “controlled 90 degree F environment” for proofing the constructed braid.
• When making cuts in the dough for the braid, make sure they are not too long and provide a solid base for the filling.•
DANISH DOUGH
Makes 2-1/2 pounds dough
Ingredients

For the dough (Detrempe)
1 ounce fresh yeast or 1 tablespoon active dry yeast
1/2 cup whole milk
1/3 cup sugar
Zest of 1 orange, finely grated
3/4 teaspoon ground cardamom
1-1/2 teaspoons vanilla extract
1/2 vanilla bean, split and scraped
2 large eggs, chilled
1/4 cup fresh orange juice
3-1/4 cups all-purpose flour1 teaspoon
salt

For the butter block (Beurrage)
1/2 pound (2 sticks) cold unsalted butter
1/4 cup all-purpose flour
DOUGH
Combine yeast and milk in the bowl of a mixer fitted with the paddle attachment and mix on low speed. Slowly add sugar, orange zest, cardamom, vanilla extract, vanilla seeds, eggs, and orange juice. Mix well. Change to the dough hook and add the salt with the flour, 1 cup at a time, increasing speed to medium as the flour is incorporated. Knead the dough for about 5 minutes, or until smooth. You may need to add a little more flour if it is sticky. Transfer dough to a lightly floured baking sheet and cover with plastic wrap. Refrigerate for 30 minutes.
Without a standing mixer: Combine yeast and milk in a bowl with a hand mixer on low speed or a whisk. Add sugar, orange zest, cardamom, vanilla extract, vanilla seeds, eggs, and orange juice and mix well. Sift flour and salt on your working surface and make a fountain. Make sure that the “walls” of your fountain are thick and even. Pour the liquid in the middle of the fountain. With your fingertips, mix the liquid and the flour starting from the middle of the fountain, slowly working towards the edges. When the ingredients have been incorporated start kneading the dough with the heel of your hands until it becomes smooth and easy to work with, around 5 to 7 minutes. You might need to add more flour if the dough is sticky.
BUTTER BLOCK
1. Combine butter and flour in the bowl of a mixer fitted with a paddle attachment and beat on medium speed for 1 minute. Scrape down the sides of the bowl and the paddle and then beat for 1 minute more, or until smooth and lump free. Set aside at room temperature.
2. After the detrempe has chilled 30 minutes, turn it out onto a lightly floured surface. Roll the dough into a rectangle approximately 18 x 13 inches and ¼ inch thick. The dough may be sticky, so keep dusting it lightly with flour. Spread the butter evenly over the center and right thirds of the dough. Fold the left edge of the detrempe to the right, covering half of the butter. Fold the right third of the rectangle over the center third. The first turn has now been completed. Mark the dough by poking it with your finger to keep track of your turns, or use a sticky and keep a tally. Place the dough on a baking sheet, wrap it in plastic wrap, and refrigerate for 30 minutes.
3. Place the dough lengthwise on a floured work surface. The open ends should be to your right and left. Roll the dough into another approximately 13 x 18 inch, ¼-inch-thick rectangle. Again, fold the left third of the rectangle over the center third and the right third over the center third. No additional butter will be added as it is already in the dough. The second turn has now been completed. Refrigerate the dough for 30 minutes.
4. Roll out, turn, and refrigerate the dough two more times, for a total of four single turns. Make sure you are keeping track of your turns. Refrigerate the dough after the final turn for at least 5 hours or overnight. The Danish dough is now ready to be used. If you will not be using the dough within 24 hours, freeze it. To do this, roll the dough out to about 1 inch in thickness, wrap tightly in plastic wrap, and freeze. Defrost the dough slowly in the refrigerator for easiest handling. Danish dough will keep in the freezer for up to 1 month.

APPLE FILLING
Makes enough for two braids
Ingredients
4 Fuji or other apples, peeled, cored, and cut into ¼-inch pieces
1/2 cup sugar
1 tsp. ground cinnamon
1/2 vanilla bean, split and scraped
1/4 cup fresh lemon juice
4 tablespoons unsalted butter
Toss all ingredients except butter in a large bowl. Melt the butter in a sauté pan over medium heat until slightly nutty in color, about 6 - 8 minutes. Then add the apple mixture and sauté until apples are softened and caramelized, 10 to 15 minutes. If you’ve chosen Fujis, the apples will be caramelized, but have still retained their shape. Pour the cooked apples onto a baking sheet to cool completely before forming the braid. (If making ahead, cool to room temperature, seal, and refrigerate.) They will cool faster when spread in a thin layer over the surface of the sheet. After they have cooled, the filling can be stored in the refrigerator for up to 3 days. Left over filling can be used as an ice cream topping, for muffins, cheesecake, or other pastries.
DANISH BRAID
Makes enough for 2 large braids
Ingredients

1 recipe Danish Dough (see below)
2 cups apple filling, jam, or preserves (see below)

For the egg wash: 1 large egg, plus 1 large egg yolk
1. Line a baking sheet with a silicone mat or parchment paper. On a lightly floured surface, roll the Danish Dough into a 15 x 20-inch rectangle, ¼ inch thick. If the dough seems elastic and shrinks back when rolled, let it rest for a few minutes, then roll again. Place the dough on the baking sheet.
2. Along one long side of the pastry make parallel, 5-inch-long cuts with a knife or rolling pastry wheel, each about 1 inch apart. Repeat on the opposite side, making sure to line up the cuts with those you’ve already made.
3. Spoon the filling you’ve chosen to fill your braid down the center of the rectangle. Starting with the top and bottom “flaps”, fold the top flap down over the filling to cover. Next, fold the bottom “flap” up to cover filling. This helps keep the braid neat and helps to hold in the filling. Now begin folding the cut side strips of dough over the filling, alternating first left, then right, left, right, until finished. Trim any excess dough and tuck in the ends.Egg WashWhisk together the whole egg and yolk in a bowl and with a pastry brush, lightly coat the braid.
Proofing and Baking
1. Spray cooking oil (Pam…) onto a piece of plastic wrap, and place over the braid. Proof at room temperature or, if possible, in a controlled 90 degree F environment for about 2 hours, or until doubled in volume and light to the touch.
2. Near the end of proofing, preheat oven to 400 degrees F. Position a rack in the center of the oven.
3. Bake for 10 minutes, then rotate the pan so that the side of the braid previously in the back of the oven is now in the front. Lower the oven temperature to 350 degrees F, and bake about 15-20 minutes more, or until golden brown. Cool and serve the braid either still warm from the oven or at room temperature.
The cooled braid can be wrapped airtight and stored in the refrigerator for up to 2 days, or freeze for 1 month.

MY COMMENT
Ok, is my fourth challenge and this is the best one, in my opinion.
As my friend comida de mama says danish braid is TRULY SCRUMPTIOUS even if technically difficult.

It can be classified in advance technique but as I had my first blog's post on puff pastry it was easier due to past exercises.

The recipe calls for cardamom seeds that I've easily found on an indian shop nearby home, for orange zest I've used dried one of and herbalist shop.

Having three children I haven't much time to spend in my kitchen so on a sunday early morning I've started my challenge.
Opened the fridge and...only an egg so I decided to half ingredients and make only a braid.
Because my children were sleeping when I've started, I've decided to avoid the standing mixer making dough without it and it was really funny and easy.

Laminate the dough was like comb an angry cat...terrible.

I had to fight with my children claiming for a piece of dough (and they stole it) and I used the double turn technique insted the letter fold but unfortunately I've made some little hole in the dough superficial layer so butter escaped, a small amount of course.

My dough rest in the fridge for a longer time (beetween rolling\folding step) because here in Italy was hot enough to melt buttered layer and I've found useful the temperature table even if it was a little bit hard to roll in the first phase of rolling.

I've referred to the braiding technique of comida de mama in order to obtain a perfect one (thanks a lot, elena).

As filling I'm in my sabaion period and remembering one of my first post when I started my blog adventure I use a sabaion cream adding two egg white firmily whipped.
So my filling was fluffy and tried to escape out of braid's holes during cooking time but the final result was perfect, like a mousse fluffy and with a lot of bubbles.

As glaze nothing more simple...ice sugar and some lemon drops.

It was appreciated and my mother-in-law fell in love with it and wasn't enough in her opinion so, for next time, I'll be obliged to do the entire recipe not halved.

But I'll be glad to make it again and this is my personal satisfaction for this challenge.

Finally, I'm sure that my laminated dough technique has been refined and, as my personal challenge, I'm going to ameliorate it using this DB's challenge tips and tricks.
I must make it again and again and again because I was so enthusiastic.

Only the last note, I'm proud because I've used for my shots an old tea-cup of the old granny of my mother in law...in the '800, and I love it.
As usual, thanks to the june's organizers Kelly of sass and veracity and Ben of what's cooking? and looking forward the next challenge and...don't forget to have a look to the DB blogroll, it can be easily found on my right side-bar.

And last but not least...this is my filling recipe, stay tuned!

350 ml whole milk
30 g butter
2 egg yolks and 2 firmily whipped egg white
60 g granulated sugar
2 tbs marsala wine
20 g (or 1 tbs) corn starch
warm milk and butter till the butter has been melted into the milk
whip the egg yolks with sugar and gently add the corn starch and the milk-butter mix.
Put the cream into a simmering water bath and cook till it will be creamy like a custard, then add the marsala wine.
Put out of flame and let it cool.
Whip firmly the egg white and add to the cooled cream.
Fill your braid

giovedì 26 giugno 2008

Antò fa caldo


recitava la famosa pubblicità.
E caldo lo fa davvero, alla faccia mia.
E mannaggia a chi lo invocava pregando manitù
Eh si mi tocca dirlo, come ogni anno rispunta il fatidico tormentone.
Quando ancora fa abbastanza fresco (leggasi, si sta bene) tutti a lamentarsi per il ritardo dell'estate e poi....è arrivata l'estate, si ma che caldo...
E insomma come si dice in sicilia larga non vi viene e stretta non vi trase.
Ora, ma come si può dire che si sta bene quando fuori ci sono 40° scirocco tipo phon e si devono far sempre le solite cose e in più con la pressione sotto le scarpe.
Io comunque coerentissima con me stessa lo ribadisco, per me l'estate è una stagione che andrebbe abolita.

Dulcis in fundo che si fa in cucina?

una bella colata di cemento sul piano cottura? un sigillo termosaldato al forno?
No, si tira avanti e per farla ancora più difficile il forno non si sigilla, si accende per fare questi.
Questi sono i pomodori con il riso il piatto estivo romano per eccellenza.
Sono facili da mangiar anche a morsi se si vuole e se il siciliano in spiaggia si porta la teglia di anelletti al forno, il romano ci va con i pomodori come dire: lido che vai piatto che trovi.
Farli è semplice, dovrete far pace con l'idea di accendere il forno.

Svuotate i pomodori raccogliendo succo, polpa e semi in una ciotola.
I pomodori vanno fatti sgocciolare a testa in giù dentro uno scolapasta

Nel frattempo con un mixer ad immersione frullate l'interno dei pomodori cui avrete aggiunto uno spicchio microscopico di aglio, tanto basilico e olio tanto da ottenere un composto liquido, liquidissimo.
Regolate di sale e pepe, ovviamente.

Al liquido frullato unite il riso CRUDO (io uso un riso per risotti) nella dose di un cucchiaio a pomodoro (es 9 pomodori 9 cucchiai di riso) più un paio per la teglia.

Farcite i pomodori e sistemateli con il loro coperchietto in una teglia dove prima avrete messo le patate e le cipolle tagliate a grosse fette e condite con poco olio sale e pepe.
Spargete sulle patate il composto di pomodoro frullato e riso se vi è rimasto, farà una bella ed invitante crosticina
Forno a 180° fino a quando il riso non è cotto.


Ovviamente io non uso i pomodori belgi enormi ma i ramati tondi, tzè, semplicemente perdo un pò di più del mio tempo per scegliere quelli più grandi.


mercoledì 25 giugno 2008

recchie a sfavor di telecamera


Serata speciale quella di lunedì.

Primo perchè con una faccia tosta che non mi riconosco mi sono imbucata a casa del mio amico Maurizio e poi perchè la sua amica Mina, pugliese, ha preparato le orecchiette.

Mai viste fare, una velocità impressionante, sono rimasta praticamente ipnotizzata se non fosse stato per il fatto che Marta stava per fare un volo a testa in giù dallo scivolo nessuno mi avrebbe staccato.

Avrei voluto fotodocumentarvele meglio ma la spianatoia (fissa) era davvero a sfavor di inquadratura e io non avevo la telecamerina per girare almeno un video.

In ogni caso provo a dare qualche tips and tricks ma poca cosa perchè se c'è una cosa che ho imparato è che per imparare a fare una cosa la devi appunto...fare.

Ho provato anche io ma son venuti fuori dei dischi volanti piuttosto.

Acqua e farina e impastare a formare una pasta abbastanza dura (per dura intendo non della consistenza per tirarla con il mattarello, leggermente più dura).

Dopodichè di taglia un pezzo di pasta e si manipola formando un cordoncino dello spessore di...un grosso mignolo.

Dal cordone di pasta si taglia con un coltello seghettato un pezzetto grande quanto l'unghia del grosso mignolo.

OOOOOhhhhh non vi lamentate non saprei con cos'altro paragonarlo.

Viene fuori una specie di cubetto.

Ok, appiattitelo con il coltello tenendo fermo un lembo e trascinando contemporaneamente la pasta.

Ci siete?

ecco dovrebbe venir fuori un'orecchietta o uno strascinato (ora mi becco i fulmini pugliesi) e per quanto mi riguarda...un disco volante.

Un'ultima cosa GRAZIE MAURIZIO E GRAZIE MINA


lunedì 23 giugno 2008

sorridi...click e un ospitino gradito (in english below)


bene, parliamone.
La mia convinzione si fa più radicata man mano che questo blog acquisisce uno stile.
E la mia convinzione è questa: o le foto le sai fare o no.
Bella forza.

Vi capita mai di fotografare qualcosa di brutto?
No, non dico bruttino ma estremamente brutto anche se eccezionalmente buono.

Eccolo.
La tentazione di buttare l'intero set di foto nel cestino c'è stata tutta, non c'era opera di maquillage che tenesse eppure la luce era perfetta, la mise en place è stata quanto di meglio potessi fare e porca paletta la mia genovese continua ad essere brutta anche se buona.
Ecco in questi casi uno appende la macchina fotografica al chiodo e si da ad altro.
Non io, ve la prendete così com'è di meglio non son riuscita a fare ma la bontà di questo antico arrosto con le cipolle ridotte in crema e tale e tanta che non riesco nemmeno a trovare le parole per comunicarla.


La ricetta è quella della mia amica Clelia ho omesso solo 3 cose:
lo strutto, il chiodo di garofano e la pancetta tritata.
Perchè?


Io sono una specie di OGM non riesco mai a riprodurre fedelmente, in ogni caso questa carne va benissimo per le bambine e ho creduto che magari non avrebbero gradito l'aroma del chiodo di garofano.

In ogni caso riporto la ricetta anche qui per comodità.
Ingredienti:
500 gr di carne di manzo (non primo taglio) e 500 gr di carne di maiale (entrambi i tipi di carne in un solo pezzo)
- 1 kg di cipolla
- 1 carota e un pezzo di gambo di sedano
- appena un'idea di pancetta
- Vino bianco (tanto)
- 1 cucchiaino d concentrato di pomodoro
- Olio e.v. d'oliva e strutto
- sale e pepe
Affettate molto sottilmente le cipolle, le carote, il sedano e metteteli in un tegame di coccio con un cucchiaio di strutto ( io lo uso solo a gennaio) e l'olio, la carne legata, (io che sono eretica ci metto anche un chiodo di garofano) e la pancetta tritata (che io non uso quasi mai). Salate e fate cuocere a tegame coperto e a fuoco bassissimo, rimescolando di tanto in tanto. Quando le cipolle saranno cotte, alzare la fiamma e far rosolare la carne. A questo punto, aggiungete il cucchiaino di concentrato. Continuate la cottura aggiungendo, a poco a poco, il vino bianco e facendolo evaporare. Attenti che, verso la fine della cottura, il trito non si asciughi troppo. Potrete aggiungere qualche cucchiaio di acqua se necessario (io non lo faccio mai). Dopo alcune ore ( Va be'... Diciamo due e mezzo? Sarebbe meglio un bel po' di più) la carne sarà cotta e potrà essere tolta dal tegame. Il sugo dovrà risultare denso e cremoso.

Io ho sostituito il coccio con la mia Berndes di cui vado particolarmente orgogliosa (il più bel regalo di matrimonio)


E questo è l'ospitino.

Il cardellino che da qualche sera ha sostituito il pettirosso e viene a cantare sulla canna in onore delle mie bambine.

E loro lo ripagano facendo attenzione a non impaurirlo, mi hanno stupito hanno smesso di parlare e sono rimaste ad ascoltarlo cantare.

Chissà quale bella femminuccia gli stava facendo gli occhi dolci, fatto sta che si è dato un gran da fare.

IN ENGLISH PLEASE

Another traditional dish.

We are in campania, in Neaples exactly.

My friend Clelia comes from Amalfi and this is her version of an ancient preparation, the "genovese".

I don't know why this meat dish is so called but it's a tasty way to use a cheap and not valuable piece of meat.

She use toghether pork and beef.

In this version I've used only beef.

Use the same amount in weight of meet and onions chopped in thiny slices.

Put toghether in a pan with some carrots finely chopped, some celery chopped, olive oil, pork suet (just a spoon she says and only in winter, otherwise you can use like me only oil), some bacon finely chopped (I didn't use it), and a clove.

All the ensemble must gently stuff for about 2 hours and then add some warm white wine and two teaspoon of tomato sauce of concentrated tomato paste

Stuff again for at least another hour so meat will be tender and the onion sauce creamy.

venerdì 20 giugno 2008

due forchettate in black and white (in english below)


ok signor blogger, adesso mi hai stufato continua così e ti cornificherò con wordpress, ci puoi giurare.

Scusate lo sfogo ma mi è partito praticamente tutto il post, tranne le foto.

Vabbè ricominciamo.
Questo è un piatto velocissimo, uno di quei sughi che si può fare mentre la pasta cuoce bendati e con le mani legate dietro la schiena.
Non ci credete?
seguitemi.

ovviamente i tempi sono dettati dal buon cuore del pescivendolo.
Ora pregate il vostro santo protettore che interceda in vostro favore con il pescivendolo che mosso a compassione pulirà le seppie (freschissime) ed estrarrà senza romperle le sacche dell'inchiostro.

Se poi vi ha detto sfiga, come a me (si vede che il santo protettore in quel momento era indaffarato) allora seguitemi.

Portate a casa le bestie e procedete.

La prima delle tre seppie che ho usato ha reso black & white la cucina.
Splaaaash ho rotto la sacca e inchiostrato ovunque.
Poi ho capito (ma son tarda io).

ok.
1. staccate la testa con i tentacoli dalla sacca, semplicemente tirandola. Mettetela da parte ci penserete dopo

2. toccando la sacca sentirete un qualcosa di duro sottopelle, quello è l'osso.
Spingete con il dito tenedo ferma la sacca con l'altra mano in modo che l'osso rompa la pelle e fuoriesca.
Si lo so a spiegarlo è difficile però seguite le mie parole e provate.
Presente un tizio che si chiama Montale? Nooo? nemmeno vi ricorda qualcosa? Recentemente se ne è parlato e straparlato in relazione agli strafalcioni del tema di italiano alla maturità.

3. ora tocca alla sacca. Il primo problema è capire dove sta anatomicamente la vescica con l'inchiostro (scusate la perversa deformazione professionale che mi prende tutte le volte che sono costretta a sostituirmi al macellaio o al pescivendolo).
Per mia esperienza diretta (e della mia cucina divenuta improvvisamente optical) la vescica sta all'interno della sacca verso il fondo, e allora:
prendete la sacca con la mano sinistra (al contrario per i mancini, sere prrrrrr :D) in modo che il fondo sia rivolto in alto verso il polso e la punta verso il basso.
Con una forbice tagliate per il lungo il lembo superiore dell'apertura (quello dove c'era l'osso) ma senza spingervi fino in fondo, diciamo per i due terzi ecco così, bravi.
Allargate il taglio et voilà...sotto c'è la vescica.
Estraete la vescica facendo attenzione a non romperla.
Dovrebbe essere di un grigio argenteo e molle come un palloncino pieno di liquido, se la trovate pastosa come il pongo allora buttate tutto vescica e seppia, vuol dire che non è fresca.

4. fatto questo avete fatto il grosso del lavoro. A questo punto spellate la sacca ed eliminate le interiora riducendola a cubetti.

ed ecco la ricetta.
Buttate la pasta.
Io ho usato degli spaghetti alla chitarra Garofalo (tempo di cottura 16 minuti)
Nel frattempo mettete a scaldare in una larga padella l'olio e fatevi appassire dolcemente una cipolla tritata finissima e uno spicchio di aglio schiacciato e un pezzetto di peperoncino.
mettete la seppia (tentacoli compresi) ma non la vescica dell'inchiostro fate andare per pochi minuti a fuoco vivo sfumando con un dito ( non in verticale) di vino bianco.
Spegnete il fuoco e sciogliete nell'intingolo la vescica con l'inchiostro, la dovrete rompere con la forchetta.
Scolate la pasta molto al dente con un ragno e mettetela nella padella.
Saltate e spolverate con prezzemolo tritato

Da mangiare in due, dopo aver messo i figli a letto.
La lingua nera sa di macabro lo so, ma che soddisfazione.

Se poi volete il passo passo fotografico allora eccovi accontentati

IN ENGLISH, PLEASE
This is a regional\sicilian dish.
As you know (or...do you know?) cuttlefish is widely appreciate here in italy and we have many dishes using this tasty fish.
But in most of this the ink-bladder is thrown away.
Not in this case.
You have to ask to the fishmonger to preserve (into a plastic glass) the ink-bladder (he knows where anatomically it is) and wash and chop in small pieces all the cuttlefish.
Ok run home and follows my explanation or, if you want, here is the link in which I explain with a photographic step-by-step all passages.
Unfortunately is in italian but it's not so difficult as it seems.
Chop into very small pieces an onion and a garlic glove, put in a pan with olive oil and a small piece of red hot chilli pepper and warm it gently.
Add the cuttlefish pieces (not the ink bladder!) and cook for few minutes at high flame after adding a little bit of white wine.
Turn off the flame and cook the pasta (spaghetti are the best or vermicelli or linguine).
Few minutes before pasta is ready to eat melt the ink bladder in the cuttlefish pan breaking bladders with a fork and put the pasta into the pan.
Add finely chopped parsley and serve.
A black tongue and a lot of taste,
sailor message
I add a new tag just to keep in touch with all traslated post.
It's on my tag list named "in english please".

martedì 17 giugno 2008

non ti scordar di me


Sapete la storia del non ti scordar di me?
Quella che la maestra ci raccontava da bambini...
L'angelo di Dio fu mandato a catalogare i fiori sulla terra.
Finito il suo compito stava per volare via quando sentì una vocina....non ti scordar di me....era un piccolo fiore azzurro talmente tanto piccolo che l'angelo non l'aveva nemmeno notato e così da quel giorno il fiore si chiamò così: non ti scordar di me.

ora che c'entra la favoletta con le mie erbette?
c'entra, quel piccolo fiorellino azzurro così minuscolo e così delicato è un fiore di mentuccia romana, piccolo e bellissimo e minuscolo proprio come il fiorellino della favola ma talmente profumato che sarebbe impossibile scordarsene.
Credo di averne fatto un buon uso.

L'idea è semplicissima.
La base non sono altro che zucchine trifolate a cui ho aggiunto una generosa manciata di erbette tritate, quelle della foto...prezzemolo, menta e maggiorana
al centro semplicemente dei cubetti di pesce spada crudo marinato con olio, succo di limone e scorza di limone grattugiata oltre a una spolveratina di pepe e sale
basta alternare gli strati all'interno di un anello mettendo come base le zucchine ancora calde, il pesce e un ultimo strato di zucchine.

Poi si passa al set fotografico...che è durato poco...le tre iene sono salite sul tavolo armate di forchette, mani piene di dita e cucchiaini e...addio set :D


Edito soltanto adesso
Perchè solo adesso ho letto la notizia.
In mezzo alle news di yahoo tra un gol della nazionale e l'ennesima impresa di Berlusconi, così buttata lì.
Penso che sia stato uno degli scrittori che più abbia amato nella mia adolescenza.
Forse qualcuno troverà disdicevole che io abbia editato questa notizia e l'abbia associata ad un piatto, chissà.
Forse i meno accorti, i più sapranno di certo che l'ho associata ad un fiore e alla bella storia di un angelo di Dio.
Per quanto mi riguarda mi è rimasto il freddo gelido di un pezzetto di neve nel cuore

venerdì 13 giugno 2008

un nome di donna....wikipediando


Charlotte ecco come risolve la questione la più grande enciclopedia virtuale del web aka wikipedia.
Queste charlotte nascono da due eventi...la discussione con il marito che sperava di trovare la bavarese di cui sotto ed invece è rimasto fregato perchè l'avevo portata ai miei colleghi di guardia notturna e la mia testardaggine sulla bavarese di classica esecuzione.
Ora, nonostante io sia stata molto attenta nella preparazione della crema inglese di base, nonostante io sia stata molto tirch...ehm...parsimoniosa con la quantità di gelatina, nonostante l'impatto estetico di un dolce di questo tipo sia notevole, specie nella versione monoporzione io continuo a trovare la crema un pò troppo sostenuta (leggasi gommosa).
Non che io non ami la gelatina ma in questo tipo di dolci mi piacerebbe una struttura più aerea, tipo mousse.
L'obiezione potrebbe essere legata al fatto che se non si sostenesse la crema con la gelatina si finirebbe per avere un blob colante.
Non so, certo è che sicuramente questo tipo di dolce si presenta ad infinite variazioni, è elegante e di effetto.
Così mi sono permessa di saltabeccare per la rete alla ricerca di varianti
C'è la golosissima versione di ara & coco
E chissà quanti altri si sono cimentati
Io però....
vabbè e anche questa è fatta.
E' bello a volte parlare unicamente di cibo, consistenze, impressioni, gusti e tecniche solo per il piacere di avviare una qualche discussione in merito senza altri pensieri in testa.
ecco la mia versione e i miei tips and tricks.
4 tuorli
4 cucchiai di zucchero
350 ml di mix latte\panna o in alternativa solo latte o solo panna
l'aroma prescelto (in questo caso ho diviso a metà la crema e aggiunto all'una una purea di 100 gr di fragole frullate e all'altra un cucchiaio scarso di caffè solubile)
350 ml di panna montata fredda e dolcificata con un cucchiaio scarso di zucchero a velo
4 gr di gelatina in fogli
Montare i tuorli con lo zucchero e nel frattempo scaldare il latte (basterà che il liquido frema senza bollire, intorno ai 70° per i precisini termometro muniti)
Stemperare un pò di latte caldo (o il mix panna\latte) al composto di uova e in seguito aggiungere il resto del latte amalgamando bene con una frusta a fili.
Trasferire la ciotola (io uso quelle in acciaio) su una pentola di acqua bollente e cuocere lentamente finchè la crema non velerà il cucchiaio.
Nel frattempo ammollare la gelatina in acqua fredda, strizzarla e aggiungerla alla crema ancora calda sciogliendo bene, aspettare che la crema raggiunga la giusta temperatura e possa essere unita alla panna montata senza smontarla perchè troppo calda.
A questo punto io ho diviso la crema a metà.
Ad una parte ho aggiunto un cucchiaio scarso (occhio che se esagerate la bavarese diventa quasi amara) di caffè solubile mentre all'altra metà ho unito una purea di fragole frullate con il mixer ad immersione dopo aver incorporato la panna montata.
Il montaggio è abbastanza semplice, basta anche una tortiera a cerniera o dei coppapasta monoporzione o un anello da torta.
Si posiziona l'anello sul piatto da portata e si fodera con i savoiardi mettendo all'interno la crema.
Il tutto si fa riposare in frigo affinchè la bavarese si consolidi.
Basta poi sfilare l'anello e completare decorando.

martedì 10 giugno 2008

tecnicamente pieno di foto


bene...se guardate giù al post precedente si parlava di queste sigarette.
uno sfizio sfizioso, roba da gelati...anni 80 tanto per tornare all'iniziativa di salsa di sapa.
Insomma chi non li ha apprezzati e non li apprezza ancora scagli la prima pietra.

Detto questo adesso vi beccate tutti i passaggi anche se le foto non sono così belle come dovrebbero ma se pensate che la mia povera reflex è tutta schizzata di cioccolata, impasti vari e sciroppi colorati vi farete un'idea di che sporco lavoro è questo :D

IN ENGLISH PLEASE
Since I have an american supporter (and I'm so glad) this is the english version to make happy all my over-the-ocean friends, expecially garret.
To follow step-by-step this kind of cookie I'm going to add my translation below the italan version, writing in red color
la ricetta la riscrivo:
si tratta di fare un tant pour tant, un pari peso di
albumi a temperatura ambiente
zucchero a velo
farina 00
burro fuso

si mescolano gli ingredienti con una forchetta o con una frusta a fili fino ad ottenere una pastella densa da far riposare in frigorifero per almeno 6 ore.
Dopodiche....
si versano un paio di cucchiai di pastella densa su un foglio di carta forno...si copre con un altro foglio di carta da forno e appiattite il tutto con un mattarello riducendo la pasta ad un sottile film.
RECIPE
Use the same weight of:
egg white
icing sugar
all porpouse flour
melted cold butter
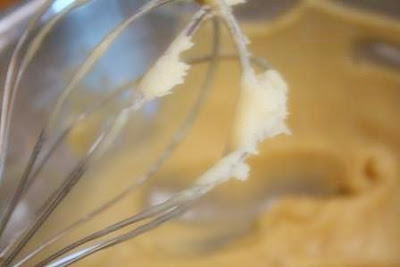
make a dough whisking well all ingredients (without whipping, just mixed with a fork) and put in the fridge for 6 hours at least.
Take the dough and put it on a big sheet of parchment paper.
Put another sheet same in size on dough and roll in a thin layer, as thin as possible.


Poi..avete presente le figurine?
Ecco fate come se i due fogli di carta da forno fossero le due parti di una figurina e staccateli.
separate the two sheets and you will obtain two thiny layer of dough.
use wet fingers to cover the small holes into the layer and bake at 180°C
la pasta sarà appiccicosa.
Inumidite il dito e spalmatela ripianandola e colmando le eventuali zone prive di pasta.

Infornate per pochissimi minuti a 180° modalità ventilata in modo che si asciughi senza quasi colorire, dopodichè con una rotella tagliapizza dividetela in rettangoli
bake briefly just to dry the layer.
and then cut it into rectangular shape I used a pizza knife

I rettangoli tenderanno a seccarsi velocemente ma non preoccupatevi.
Riinfornate ogni singolo rettangolo fino alla doratura che più vi piace...tornerà morbido e malleabile.
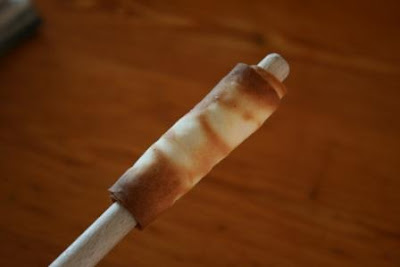
A questo punto prendete il rettangolo dalla placca del forno con una paletta e arrotolatelo velocemente al manico di una paletta di legno.
Et voilà...
the cookie will turn hard in few seconds but don't worry.
Bake again every single cookie it will turn soft again, and bake it till it will be lightly brown in surface.
Then roll it on a handle (spoon, knife or some handle round shaped) as fast as you can (it will be hot but it will take only few seconds to turn hard again so you must be very fast)
ma le forme potrebbero essere tantissime spazio alla fantasia, coppette, sigarette, oppure...


ok....va bene vi do la ricetta :D
Per il nastro di biscotto mi pare abbastanza chiaro.
Per la bavarese allo zabaione prima vi dico la mia poi vi do la ricetta.
La bavarese, qualsiasi tipo di bavarese, si basa sulla stessa tecnica.
ovvero: si fa una crema inglese cotta a bagnomaria con uova zucchero e latte aromatizzato (o metà latte metà panna liquida fresca).
Quando la crema è ancora calda si aggiunge un tot di gelatina o di agar agar insomma un gelificante e quando raffredda e la gelatina comincia a tirare si incorpora la panna montata.
Io personalmente non la amo molto fatta così...preferisco un qualcosa di più morbido, anche se tecnicamente ineccepibile mi sa sempre di budino gommoso.
Questa invece è una crema a metà strada tra la mousse e la bavarese.
Ed è esattamente quello che volevo.
120 gr di tuorli
120 gr di zucchero
100 ml di marsala secco
300 ml di panna fresca montata a neve ben ferma
4 gr di gelatina in fogli
ho montato i tuorli con lo zucchero prima a freddo con lo sbattitore elettrico e poi a caldo a bagnomaria dopo aver aggiunto 100 ml di marsale secco, ottenendo una crema montata voluminosa e aerea.
A questo zabaione ho aggiunto poi 4 gr di colla di pesce ammollata in acqua fredda e poi strizzata e sciolta a fuoco bassissimo in un pentolino.
Lo zabaione gelatinato l'ho mescolato con la panna montata a neve ben ferma e ho messo in frigo.
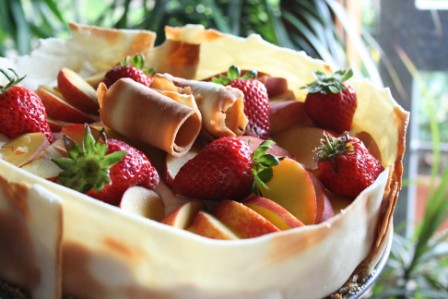
Nel frattempo ho preparato il nastro di biscotto che ho sistemato sul fondo di una tortiera e coperto il fondo della tortiera con uno strato di fette biscottate polverizzate con il cutter e mescolate a burro fuso e zucchero di canna (che poi è la base dei miei cheesecake).
E ho fatto l'errore blu, perchè avrei dovuta cuocerla e invece l'ho messa in frigo pensando che rassodasse.
Era buonissima ma assolutamente sbriciolosa.
Forse la prossima volta metterò uno strato di sponge cake.
Ho versato la crema e decorato con le fette di frutta.
Portata alla guardia notturna, il pronto soccorso ha gradito :D
in english please
This is another use of this kind of cookie dough, just a ribbon rounding a bavarian cream made with marsala wine.
as I told in the italian version I don't like so much bavarian cream for its consistence slightly gummy due to jelly.
otherwise I just love all creamy sweet and my personal interpretation of bavarian is in the midway beetween a classic one and a mousse.
those are ingredients for bavarian cream
120 gr egg yolk
120 gr granulated sugar
100 ml marsala wine or white wine or some sweet wine like icewine
300 ml cream whipped
4 gr jelly in sheets
whip yolk and sugar then transfer the bowl on a gentle simmering water bath continuing whip at medium speed.
add the wine and whip again you must achieve a well firmly areated cream at 45°C in temperature.
Wet the jelly sheets and melt at low flame (don't boil it!) and then add to the yolk cream wisking.
As cream is enough cold add the whipped cream and wisk toghether carefully.
put in the mold and then in the fridge to reach the right consistence.

IMG_8538